Look what I found
- bom20178
- Feb 20, 2025
- 6 min read
Hi Stitchymites! I hope you're having a lovely week. It's been so incredibly humid here in Sydney that I am very glad to have the cold and rainy day we are having today. I know that lots of you are having a very very cold winter so humidity probably sounds wonderful, but let me assure you its not all its cracked up to be! Especially for a menopausal woman in her 50's who is quite hot enough already, thank you very much :D
With all sorts of brand new and exciting things on the horizon in the very near future, I'm taking advantage of Damo's new business venture not being quite ready yet and having him tidy some things up for me on the website and around the general "Sarah Fielke" space. One of the things he's doing is archiving my old blog - some of the content will be reposted, some repurposed and some deleted. In the doing of that we found this tutorial for sewing pouches I did in 2015! I still use the scissor pouch today, so I thought you Smites might like to make one too. I've updated the pattern for you to suit a few things, because my methods and such have changed quite a bit in the last ten years!
These pretty little bags were made for a sew along for the launch of a new Oakshott collection. You guys know me, I love a bit of appliqué, so I designed some little flat pouchies to put all my sewing pretties in. They are all still kicking around in the studio with things inside, and I use the scissor one pretty regularly.
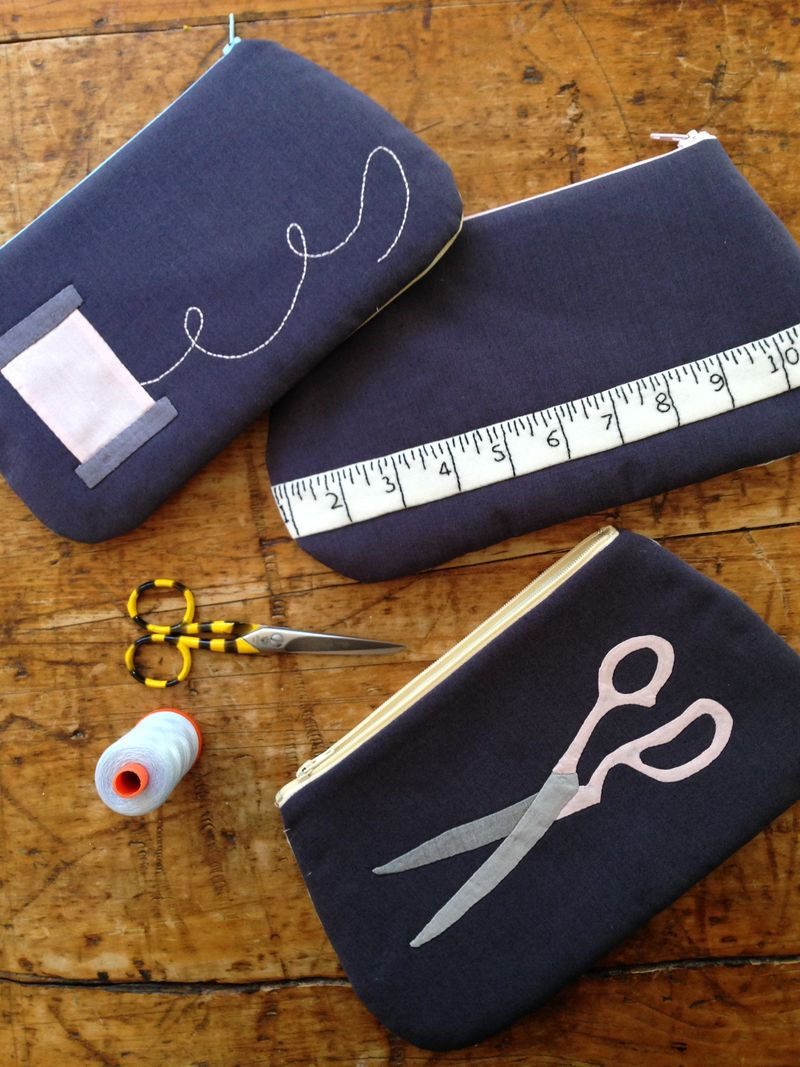
These are dead easy to make. I have used needleturn appliqué because that's my thang, but you can easily use fusible appliqué or buttonhole or whatever you fancy. Or just piece the strippy bits on both sides, and leave the appliqué off!
First click here to download the three pdf pattern sheets - BAG, STITCH, SCISSORS 2
To make all three pouches you will need:
* 25cm (10") of dark fabric for the appliqué background on the pouch fronts. I used Oakshott cotton for mine, which they unfortunately don't make any more - but a Kaffe Fassett shot cotton would do the trick! You could just squeeze get all three backgrounds out of a metric fat quarter (a US FQ won't do it) but you would be safer with a 10" (25cm) strip.
* fat 8ths of 8 different shot cottons for pouch backs, appliqué and lining fabric
*Three 9" zippers to co-ordinate with your fabric
* 20" (50cm) Pellon Fusible Fleece or similar
*one piece of template plastic, or a laminating machine
*silver gel pen to mark the appliqué and embroidery
*appliqué tools - if you are using my appliqué method you will need liquid appliqué glue, a silver gel pen, milliners needles and 80 weight thread to match your appliqué fabrics
*embroidery needles
*Aurifil Mako 12 weight cotton in black and light pink (stranded embroidery cotton will work just fine too)
The fleece, needles, 80 and 12 weight threads, and gel pens are all available from www.sarahfielke.com
First we are going to make the stripes for the back of the pouches. From each of your fat 8th's, cut two strips, 1 1/2" along the long side of the fat 8th. This should give you two strips 24" long. Cut each of these strips into three 8" lengths.

Mixing the colours up as you like, sew the strips together into three pieces that are each 11 strips long, using a 1/4" seam and pressing the seams to one side.
Trace the bag template onto the template plastic and cut out with scissors.
Trace around the bag template to cut out two pieces from your stripped piecing.

Cut another piece from the stripped piecing that is 4" long. Cut a piece of light green that is 4" wide by 11". Sew the pieces together along the long edge. Cut a bag back from this piece.
Using the bag template, cut out 6 pieces from the fusible pellon. Fuse three of them to the backs of the three pieced backs you have made.
Using a window or a light box, trace the word "Stitch" onto the green fabric, at least 3/4" from the bottom of the green piece.. Backstitch over the word (through the Pellon) using black thread - a single strand of Mako thread (it does not separate) or 2 strands of stranded embroidery cotton..
You should now have pouch three backs that look like this (without the zippers of course!)

Now for the fronts. Using the bag template, cut three pieces from your dark appliqué background fabric.

For the tape measure bag, cut a strip from one of the fat 8ths that is 2" wide. Using a Hera marker or by ruling a line, mark the back of the strip 1/2" in from each edge on the back. Trace the tape measure pattern onto the strip using a light box or window, with the top edge of the measuring tape lines right along one edge. Back stitch the pattern. Turn the embroidery to the back and press the edges to the back 1/2" along the lines you made.
Using the appliqué glue or your preferred method, place the strip along the bottom edge of one of the pouch fronts, 2" from the bottom. Appliqué the strip to the pouch. Iron a piece of fleece to the back of this bag piece.

For the thread reel, cut out the pattern pieces for the reel and the block of thread from the grey and pink fabrics. Cut them out a scant 1/4" from the gel pen line and glue them to the background using small dots of liquid appliqué glue. Finger press around each shape and stitch them to the background using thread to match the appliqué fabric. If you haven't ever tried my appliqué method before, I have an on demand class at my website that teaches you everything you need to know!
Using a window or a light bow, trace the thread line onto the background with the silver gel pen. Iron a piece of the fusible pellon to the back of the appliquéd bag front, and back stitch along the drawn line using the pink 12 weight or 2 strands of embroidery cotton.

To make the scissors, repeat the steps for the thread reel. The arrows on the scissor placement diagram show you which pieces go underneath which. Iron a piece of fusible fleece to the back of this piece when you have completed the appliqué.
When you have appliquéd all of the bag pieces and ironed a piece of fleece to them, it's time to put them together!
Place a piece of your bag lining (mine shown here is Cookie Book by Cotton and Steel - I had made all three pouches without taking pictures - very silly - and then didn't have enough for my insides when I made another for demo!) face up. Place your zipper face up along the straight edge of the lining, with the ends poking out. It's better to have a longer zip not a shorter one, you can always trim it back. Place the pouch front on top of the zipper, face down. Pin through all three layers.
I hasten to point out that I am a quilter not a bag maker so these instructions are as basic as can be! For a more detailed (and very cute) zipper pouch instruction, check out Ayumi's post here - that's where I learned to put in a zip.

Using your zipper foot, sew along the straight seam through all three layers. Unzip the zip halfway, and start at the end furthest away from the zipper head. When you get close to the zipper head, stop and lift your foot, unzip the zip past your needle, then lower the foot and sew to the end.

Press the lining and the bag front away from the zipper, both to the same side. Repeat this process with the lining and the bag back and press them both away from the zip again. You should have something that looks like this.

Seperate the linings from the front and the back of the pouch, and put them back together again with the linings right sides together, and the front and back right sides together, like this.

Starting at an edge of the lining, sew all the way around the edge of the pouch, 1/4" in from the edge. When you come back towards where you started be sure to leave a good gap so you can turn the pouch through when you are done.
**Be careful to have the zipper unzipped at least halfway when you do this! Or it's a pain in the proverbial. Ask me how I know :)

Trim the ends off the zip for a neat finish.

Trim the seams on the curved edges back a little to make them easier to turn. There is no need to clip.
Turn the pouch right side out through the hole you left in the lining. Use a turning tool or a knitting needle or similar to push all the seams and curves out smoothly, and press as you do so. Your bag will look like this:

Stitch the opening in the lining closed, either by hand or machine, and then push the lining into the bag and press everything down smoothly. And you are DONE. Fill with cute stuff. ;)

Thank you for the awesome pouche patterns. Perfect gift for my sewing friends birthday’s 🥰